Author: Samio

  • Skull Doll Halloween Makeup Tutorial

    Skull Doll Halloween Makeup Tutorial

    My Halloween festivities began on Saturday and in true Samio style I had to add a bit of colour and sparkle to my first Halloween creation. Not one to do things by half, I went all out with a full face of paint, a wig and giant lace bow. Who said Halloween can’t be fabulous!

    Look below to see step by step, how I achieved this look.


    What I used:

    For application:


    Examples of some of the products used (colours vary):

    Samio Models Own makeup


    2013-10-28 18.16.50

    I started by applying the white face paint to my face using my face paint sponge. I covered my face, stopping just before my hair line, going to the edge of my jaw line and avoiding my ears, as to create a mask type shape.

    Once the sponge application had been applied, I then left it to dry and then painted on a second layer to create better coverage. This time I used the thick end of my double ended makeup brush.

    2013-10-28 18.17.17

    After painting my face, I used the glitter eye pencil to draw and colour in two large circles around my eyes. I then used my eyeshadow applicator to apply the bright blue eyeshadow, to the eyelids and just under the eye.

    Next I carefully drew around the blue circles, using the black eyeliner pencil, before going over the line with a black liquid eyeliner.

    2013-10-28 18.20.36

    Usiging the Glam Crystals glitter eyeliner in Le Freak, I followed the outside edge of the black circle line, to create an outter glittery line.

    As before, I repeted to draw another black line around the outside of the glitter line, again using pencil and then liquid eyeliner.  I then began to carefully draw half circles around the outter line.

    2013-10-28 18.20.53

    I contiuned the half circle pattern around both eyes and then filled them in using the Glam Crystals glitter eyeliner in Hustle.

    2013-10-28 18.21.26

    Next I applied black mascara to my top lashes and using eyelash glue, I applied my jeweled fake eyelashes.

    Moving onto the nose, I used my pencil eyeliner to draw a light outline of the shape I wanted my skull nose to be.

    2013-10-28 18.21.48

    I coloured in the skull nose shape, using the black face paint. This could also be done using an eyeliner pencil or liquid eyeliner.

    I then went onto colouring the lips, using Seventeen lipstick in shade New black. I drew over the top lip line and slightly inside the botton lip line, to create a doll type lip shape. I then drew two lines out from either side of mouth.

    2013-10-28 18.22.03

    Using the black eyeliner pencil, I roughly drew verticle lines through the horizontal lines either side of my mouth.

    Then using the same technique as around the eyes, on my forhead I drew a love heart using the eyeline pencil, going over it with the liquid eyeliner. I then filled in the heart shape with the Glam Crystals glitter eyeliner in Le Freak.

    2013-10-28 18.22.22

    For the finishing touches I used a makeup brush to heavily contour my cheeks, using Sleeks bronzing powder in dark. I then went over this area again, using the the blue Models Own eyeshadow, as used on the eyes.

    2013-10-28 18.22.54

    Once my makeup was finished, I added a wig and giant lace hair bow to create the finishing look…

    Samio Halloween Sull doll makeup tutorial


    Samio Hallowen Skull doll fae paint  makeup tutorial

    Happy Halloween!

    Samio x

  • X x x

    X x x

    20131002-235341.jpg
    What I Wore:
    Long sleeved top – H&M
    Loose knit jumper – Glamorous
    Skirt – H&M
    Boots – Asos
    Bow ring – Pearls & Lipstick
    Envelope clutch bag – Pearls & Lipstick

    20131002-235406.jpg

    20131002-235423.jpgSamio x

  • O.P.I Rust Gradient Effect

    O.P.I Rust Gradient Effect

    On Saturday I was out for a friend’s birthday. Before hand I had my outfit all planned and I’d picked out a cute stripe and floral print dress I hadn’t worn before. I decided to paint my nails to match my dress and go for what I like to call a rust gradient effect.

    How I achieved this nail art effect…

    Step one:

    What you will need.

    • As I wanted my colours to match my dress I chose three nail varnished in similar shades to my dress: OPI shades – Lady in Black, Your Villa Or Mine and Alpine Snow. (Base coat and top coat are optional)
    • Foam is needed to apply the gradient effect. For this you can use a clean sponge, some packaging or as I have done, use the foam that you often find inside jewellery boxes.
    • Scissors will be required to cut your foam.
    • Tweezers will help you hold the foam when applying the polish.
    • A cotton bud and some liquid nail polish remover to neaten up the edges at the end.

    O.P.I Nail Art BLog post

    Step Two:

    Paint all your nails with a base coat (optional), then apply your first chosen colour and wait for it to dry.

    Samio O.P.I  Lady in Black Nail Varnish

    Step Three:

    Cut a small square from your foam (roughly half an inch squared). Pick up the cut piece of foam with your tweezers and with your second chosen colour, lightly apply the nail varnish to your foam.

    Samio Olowu O.P.I blog post

    Step Four:

    Gently dab the coated foam to your nails, building up more and the ends and padding lighter towards the top to achieve the fading speckle effect…

    IMGP9002

    … Continue this on all your nails. Reapply the nail varnish to the foam when needed.

    Samio O.P.I gradient step 2

    Step Five:

    Cut a new clean piece of foam and choose your third colour. Again repeat the the previous process, this time focusing on the tips of the nails and fading into the previous colour….

    IMGP9007

    … You should be left with something similar to the image below, but if you’re anything like me, you will have made a mess in the process. So now it’s time to neaten up!

    IMGP9009

    Step Six:

    Neatening up is probably the easiest part. Simply get your cotton bud and dip it into your nail varnish remover liquid. With the cotton bud tip, rub around the edges of your nails to remove any excess nail varnish. Continue this until all the edges have been cleaned up. For an extra polished look, add a top coat to finish.

    IMGP9010

    The Final Result

    And that’s my tutorial on how I achieved my rust gradient effect nails… You can also try this look with so many different colour combinations, even adding more colours into the blend. Or how about adding glitter polish to the tips to add some sparkle!

    I always love the results I get from this effect and it’s a simple technique you can use time and time again with so many different colours.

    Samio Olowu O.P.I Nail art varnish black white and orange ombre

    Samio x


  • Barcelona La Mercè

    Barcelona La Mercè

    This weekend I was back in Barcelona. Once again I was visiting my close friend Lydia and this time I took my boyfriend along for the trip. Barcelona’s annual La Mercè street party festival was on, so it was a perfect time to visit.

    Barcelona from Viladomat
    – The fabulous view from my friend’s roof terrace.

    We arrived Friday evening and after excited hellos followed by a few drinks at my friend’s apartment, we headed out for steak and creamy potatoes. Once again I got to enjoy the amazing steak, at the place I’d told my boyfriend so much about. He had to agree it was the beast steak ever… After our gorgeous meal, we decided to relive our youth by heading to the fun fair. I forgot how much fun rides were! We stayed until around 2am, bounding around like big kids from one ride to the next until the place began to close. Eventually we headed back and sat drinking and chatting on the roof terrace until the early hours.

    Samio and Lydia

    IMGP8707

    SAM_0029

    Barcelona Fun Fair

    Needless to say, on Saturday we didn’t get the early start we had planned. After a much needed lie in, we headed to Federal for breakfast, where they do amazing breakfast muffins (just what we needed).Federal breakfast Barcelona

    After breakfast we went to Sagrada Família so my boyfriend could see it and get some touristy snaps. We spent the rest of the afternoon being tourists round the city, something I still haven’t tired of in Barcelona. We lounged around for a while in bar by the port and then took my boyfriend to the Champagneria so he could see what all the fuss was about. Unfortunately it was even busier than my pervious visit so we were unable to stay long but it was nice to go back and enjoy some food and bubbly in the hustle bustle.

    outside Sagrada Família

    Samio Barcelona

    On Saturday evening the original plan had been to go out for food and then go to watch the fireworks by the beach. But as we sat on the roof terrace drinking and chatting it got later and in the end we decided we had a perfect spot to view the fireworks from where we were instead. So we ordered pizza, drank and watched the fireworks before finally going out to enjoy the night life of La Mercie festival.

    Us

    Samio and Lydia Barcelona

    Sunday was our final full day. We’d had another night that had lasted into the early hours and so after another morning of sleeping in, once we were ready we went straight for lunch. We sat in the sun drinking cava and eating tapas, a perfect Sunday if you ask me. Later we went to Park Güell and then to Montjuïc to join in with more street party festivities. The day seemed to quickly blend into the evening and we were back at Lydia’s for a quick change and drinks, then back out again. The last evening went by like a blur and before we knew it, my boyfriend and I were stumbling in at 6am not long followed by my friend and her boyfriend.

    Montjuïc La Mercè 2013

    Lydia and Samio

    Samio Barcelona 2013

    On Monday it was time to fly home. With lack of sleep and a sore head I must say Monday was a struggle. After what felt like an entire day of travelling, I was finally home and crawling into bed. Despite felling hungover and slight exhausted, after a long weekend of fun, I can once again say I had an amazing time in Barcelona. It was my third and final trip there this year, visiting one of my best friends in a city I now love. No doubt I’ll be back again sometime in 2014.

    Samio Afro

    Samio x

  • Trench Coat Weather

    Trench Coat Weather

    It was battle against wind and rain to get today’s blog photos. Finally when the weather prevailed I was left with a few shots, that I’m not completely happy with (hence the chopped off heads). Fitting to the weather, I wore my trench coat of course!

    What I wore:

    Trench coat: Topshop

    Stripe sheer shirt: Forever 21

    Bag: Zara

    Ring: Primark

    Skirt: Topshop

    Shoes: Zara

    Samio Topshop Trench Coat 2


    Samio Topshop Trench Coat 1

    Samio x


  • The Heist

    Sporadically you’ll have one of those nights that are out of the blue, unplanned and completely awesome. Well Thursday night was that night for me.

    I was in town at 11am for an audition, after that my plans were to buy more fabric, drop off LBD’s spare key and then head home and spend the afternoon sewing. The only problem was that when I got to LBD’s, we couldn’t stop talking (as usual) and we decided to continue our catch up over a late lunch.

    We went to Rosso and had a gorgeous lunch (that place never fails to disappoint) and after having our fill and nattering over wine, we decided to head back to LBD’s and drink more wine.

    I knew Macklemore & Ryan Lewis were playing in town. I’d tried to get tickets in July but to my dismay, they had sold out. After mentioning it to LBD, she suggested I put a tweet out, something I hadn’t even thought of. Low and behold, someone got back to us offering two tickets for sale at face value. An offer I could not refuse of course.

    Before we knew it we were rushing around to get ready, applying copious amounts of eyeshadow and feeling like giddy teenagers again. It’s not like me to go out not dressed up (and in flats!) but I actually didn’t care and saw how practical it was not wearing ‘break your neck’ shoes for once, especially to a gig.

    The gig was amazing and afterwards LBD and I headed to Liars club to finish the night with a profuse amount of zombies. Needless to say, the next day we were both feeling tired and slightly tender but it was definitely worth it!

    20130914-160018.jpgSamio x

  • First Purchases Of September

    First Purchases Of September

    On Tuesday I headed to Nottingham to shoot for Speedo. My call time wasn’t until 12:30 and as I’d arrived in the city early, I couldn’t resist popping in Zara whilst I had time to kill and check out the new items they had in for A/W 13.

    As I make clutch bags, it is a rarity that I actually do buy bags but when I do they are often from Zara. When this cobalt blue handbag caught my eye, I knew I had to have it. The bag is great value and good quality and I LOVE the colour.

    Zara had some gorgeous shoes and boots in store for A/W (I shall be paying another visit soon). I love these monochrome flats I picked up. It’s not often I buy flats but these are certainly very me.

    My third Zara purchase was this pyjama style blazer/jacket. It was on sale so I managed to grab a bargain with this one. I think it will look great worn both dressy and casual and will definitely come in handy on some chillier nights out.

    The O.P.I nail lacquer obviously isn’t from Zara but it was a start of September purchase nevertheless. For me, I always find it important to own a nude nail polish. It’s good for when I’m modelling and I want my nails to look nice but not painted in a colour that stands out. My previous nude O.P.I shade DULCE DE LECHE, had just ran out so I decided to replace it with a new shade. I purchased O.P.I shade, DON’T PRETZEL MY BUTTONS as a replacement and I like this one even better.

    Samio x

  • Braid Out Vs Wash & Go

    Braid Out Vs Wash & Go

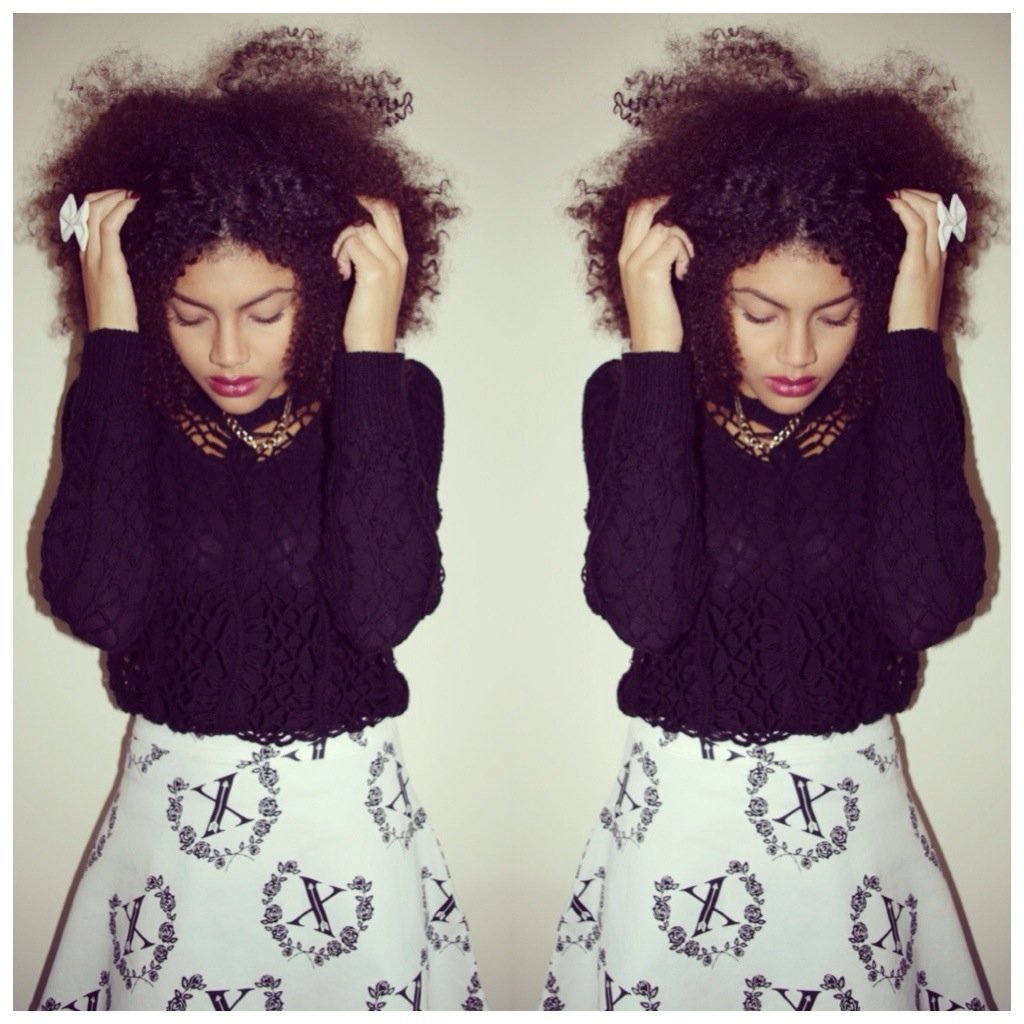
    I constantly get asked what my hair routine is and what products I use. So I thought it was about time I finally did a hair post detailing my two go to techniques that I regularly use to achieve my most common hair styles.

    BRIAD OUT

    I regularly do a braid out when I’m busy and don’t have time to wash and dry my hair in the morning. A braid out is achieved by braiding the hair and then leaving the braids in for a length of time before taking out the braids. Once the braids are taken out you should be left with hair which has been tamed slightly as it has taken the shape of the braids, to create loose curls or waves. Obviously the longer you are able to leave the braids in the better the desired result, when taking the braids out. Often perpetration the night before I find works best. A lot of people see braid outs as a chore but for me I find it one of the simplest ways to prep my hair and treat my hair at the same time.

    What products should I use and how much should I use?

    The first thing I do before I braid my hair is prep my hair with products. If I’ve just washed my hair I’ll usually wait until my hair is almost dry but still slightly damp to add the products. If I’m not washing my hair and I’m just adding more product, I’ll sometimes dampen the hair first by patting it with wet hands. I do this so not to soak the hair but just to lightly wet it to make it more manageable when braiding. The products used can often help to dampen the hair too, again making it more manageable for braiding. I’ll lightly comb through the sections with my fingers before braiding each part.

    Which products you use is up to you and it often takes some experimenting and trying out different things to find out which products work best for you.

    The products I mostly use when doing a braid out are; Macadamia Oil Treatment and Inecto Coconut Hair Repair Treatment. The Inecto treatment is actually a wash out product but I find it works really well at keeping my curls intact when left in my hair. I’ll usually use about two large dollops of the Inecto treatment for each braid and then run through the ends with a pea sized amount of the Macadamia oil treatment.

    20130901-162751.jpg

    How many braids should I do and how should they look?

    The amount of braids/plaits you do is up to you. The braids shouldn’t take you hours to do. Depending on how much time I have to spend prepping my hair, I’ll usually do between two and six braids (two when I’m feeling really lazy). The amount of braids you do also affects what type of curl/wave pattern you’ll achieve. Usually bigger braids and plaits give a looser wave and smaller ones create a much tighter wave or curl.

    Most times I’ll do five braids and although they don’t have to look particularly neat, it always helps to make one of the parts where you intend to have your actual parting once the braids are taken out.

    For this braid out I went for a middle part.

    20130901-124735.jpg-Continue braiding the hair like this until you’ve braided all the hair.

    Do I need to wrap my hair after braiding?

    Before going to bed it’s best to cover your hair with some kind of hair net or scarf, that way it stops friction between the hair and the pillow, as to prevent frizz. If I’m going out and my hair is in braids I’ll usually wear a headscarf.

    20130901-134224.jpg
    Taking out the braids

    Take out each braid until you’re left with a head of wavy/curly hair similar to this.

    20130901-130054.jpg

    How do I separate the hair and make it look more natural?

    An important tool to use is an afro comb. If you don’t have an afro comb, don’t panic, you can always use your fingers to tease out the hair.

    Start with a wide tooth afro comb and working from the root, gently tease the hair out. Be carful not to drag the comb all the way through the hair, as this will brush the hair out and ruin the style. I’ll usually work on my hair with a smaller toothed comb towards the ends but again, using your fingers is fine and the size of comb is just a preference.

    20130901-130436.jpg

    The end result

    20130901-135318.jpg
    WASH AND GO

    For a wash and go the technique is easy, you simply need to wash your hair, add your products and let it dry. I tend to do a wash and go when I have more time to wash and dry my hair and when I want to have my natural curls out. It’s all about finding the products that are right for your hair, working out how much to use and when to use them. Serums and oils are good on dry parts of the hair. For example, when I took the pictures for this post I was due a trim, so I used more oil on the ends to help eliminate frizz. Since then I’ve had a hair cut (only a trim I’ve not gone bald or anything) and now I’m able to use less serum/oily products as the ends are in better condition. It’s always good to rotate which products you use anyway, so that your hair doesn’t get use to them and stop producing the same results.

    What should I wash my hair with?

    You can use shampoo and conditioner. I use a two in one product called Macadamia Flawless (click here to see previous review post), it works wonders on my hair and helps it dry quicker. When I’m in the shower and I still have some of the product in my hair (or conditioner), I’ll comb through it, starting at the ends and working my way up before rinsing.

    What products should I use and how much should I use?

    After washing my hair I’ll wrap my hair in a towel and leave it to soak up the excess water. Whilst the hair is still damp, I apply my products. Again I use Macadamia Oil Treatment and Inecto Hair Repair Treatment. Other products I like to use are; Aussie Miracle Moist conditioner and Twisted Sister Curl Activator Cream. I like to change which products I use from time to time and will usually use a combination of about two at a time. I probably use around five large dollops of a product, making sure it’s spread evenly through my hair. I’ll use serum or the Macadamia oil treatment to run thought the ends (when needed) and any dry parts.

    20130901-163156.jpg

    20130901-140510.jpg

    How should I dry my hair?

    I used to be really good and avoid hair dryers as much as possible, letting my hair dry naturally. More recently though I’ve slipped back into my old habits and started using a hair dryer again, hence me using an old travel size hair dryer at the moment. Since I’ve started using a hair dryer again, I should buy a new one that at least ‘claims’ to be gentle on your hair…. Anyway, if you have time it’s always good to let your hair dry naturally but if you’re like me and want speedy results, then you can use a hair dryer and keep it on a lower heat if you want to ‘be good’ to your hair.

    As I’m drying my hair, I’ll tend to tease out it out slightly by pulling parts whilst drying it to add length when dried.

    20130901-145254.jpg

    How do I make my hair big?

    This is a question I get asked a lot and the cut is really important when it comes to this. Layers really help make the hair look thicker and add volume. Another thing that helps add volume is my all time favourite tool, the afro comb!

    Once my hair is fully dried, I’m ready to add volume and tease out some of the curls slightly by working though it with my afro comb. The technique is basically the same as when I’m teasing out my hair after a braid out. I’m usually slightly more rough when teasing out my hair after it’s washed and dried, as I know it takes a lot to break up the natural coils and so it won’t ruin the style. I like to tease out my hair and work through it until it starts to get a more natural look, where the curls are still intact but they don’t look too perfect. Most importantly, I like my hair to look big.

    20130901-145918.jpg

    The end result

    20130901-150800.jpg

    And there you have it, Braid out Vs Wash and go, my two favourite hair routines for styling my afro.

    Samio x

  • Whisky Cocktails

    Whisky Cocktails

    Last Saturday I spent the evening with the boyfriend and we went out for Thai food and cocktails at Chaoyophraya. I opted for a tailored look and went for an outfit I hadn’t worn before; Choosing, tailored trousers, a sleeveless shirt and a pair of black, gold studded heels. The only thing my outfit was missing was a black blazer, which is something I really need to invest in!
    I put on my favourite Illamasqua lipstick (shade Growl) and I was good to go.

    What I wore:
    Trousers: Mango
    Shirt: Lavish Alice
    Collar pin: eBay
    Heels: Kitsch Couture

    20130830-194330.jpg

    20130830-194402.jpg

    20130830-194427.jpg

    20130830-194504.jpg

    20130830-194527.jpg

    20130830-194549.jpg

    20130830-194644.jpg

    Samio x

  • :D is for Düsseldorf

    😀 is for Düsseldorf

    The weekend before last I headed to Dusseldorf for the weekend. It was my second time visiting Germany and my first time visiting Dusseldorf and I loved it! The nightlife was amazing and to say we partied the nights away is an understatement. We managed to fit in some sight seeing too and I got to visit the fabulous pink palace, Schloss Benrath.

    20130830-121920.jpg

    20130830-121953.jpg

    20130830-122017.jpg

    20130830-122046.jpg

    20130830-122106.jpg

    20130830-122123.jpg

    20130830-122154.jpg

    20130830-122222.jpg
    Samio x