Tag: Curls

  • Mega Instant Braid Out

    Mega Instant Braid Out

    Recently I’ve been getting a lot of questions on how I do my braid outs. I previously did a similar post last year: Braid Out Vs Wash & Go but since so many people have been asking and also as I sometimes use different products, I thought I’d do an updated post with lots more images to show it step by step.

    For this particular braid out I used Aussie Mega Instant Conditioner. I usually use Aussie Miracle Moist Conditioner but whilst shopping I picked up the Mega Instant by mistake and so I’ve been using this one. There isn’t a huge difference, both work rather well on my hair. I just tend to find Miracle Moist is more wet and adds more moisture to my hair, where as Mega Instant, I find is thicker and slightly heavier on the hair so I tend to use it more sparingly.

    Aussie Mega Instandt conditioner

    Here is a before picture of my hair. Here my hair had been washed the previous day and then left product free. As you can see there is quite a lot of frizz and the curls are slightly fuzzy and less defined.
    Natural Curly Afro Hair

    I first divide my hair into 5 rough sections. I only made the center part neat this particular time, as it is where I wanted my hair to part once I’d done the braid out. If you decide you want a side part, then make sure there is a neat divide on whichever side you would like to wear your part once you’ve taken out your plaits. I then apply a dollop of the Mega Instant Conditioner to my first section (usually working on a front section first) and began to comb through, slowly working through from the ends to the root of my hair.
    Macadamia Brush

    I use enough product so that the hair is damp and easy to brush through. Once the product is fully brushed through the first section of hair, you can see how my curls have become defined and tamed by the product.
    Curly Hair Aussie Conditioner

    I then tightly plait the first section of hair. I start the plait loser at the top of my head, so not to put too much strain on my hair at the root. I then begin to plait tighter about half an inch into the plait until the end.

    Tip: It’s important to make sure the hair is not too wet when you plait it, as then it often makes it harder to dry once braided up and when the hair stays wet the style doesn’t set. If you need to, wait a couple of minutes for the hair to dry a little before braiding up. If the hair is just slightly damp, then it should be fine.
    Plait 1

    I repeat this process of applying the product and then plaiting the combed through sections until I have five plaits on my head. As you can see my sections have been roughly parted, as you won’t see these back sections once the braids have been taken out. I have only paid attention to making the center part straight as you can also see below.
    Plaits

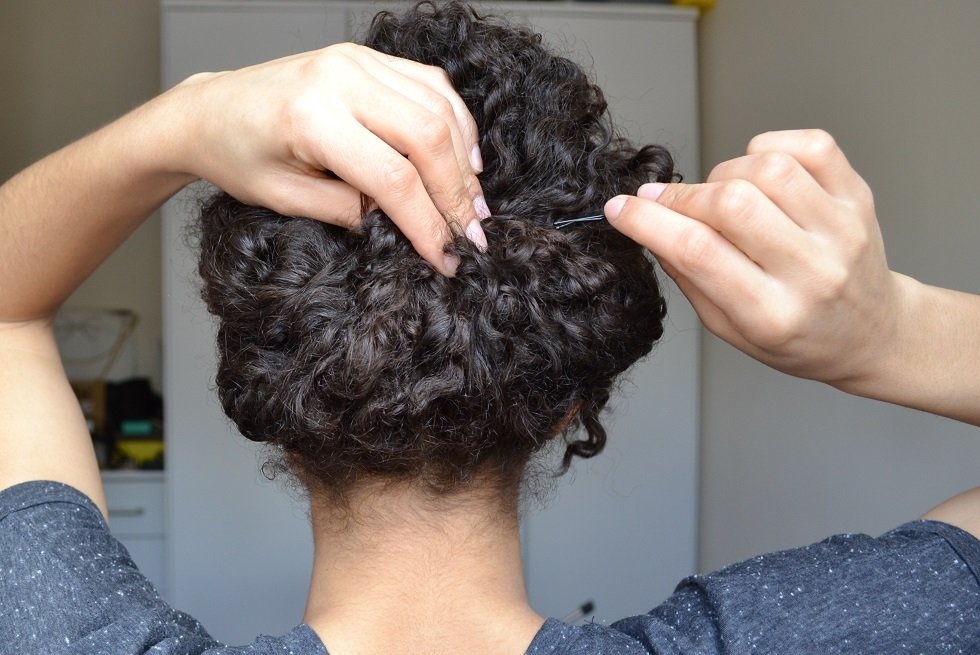
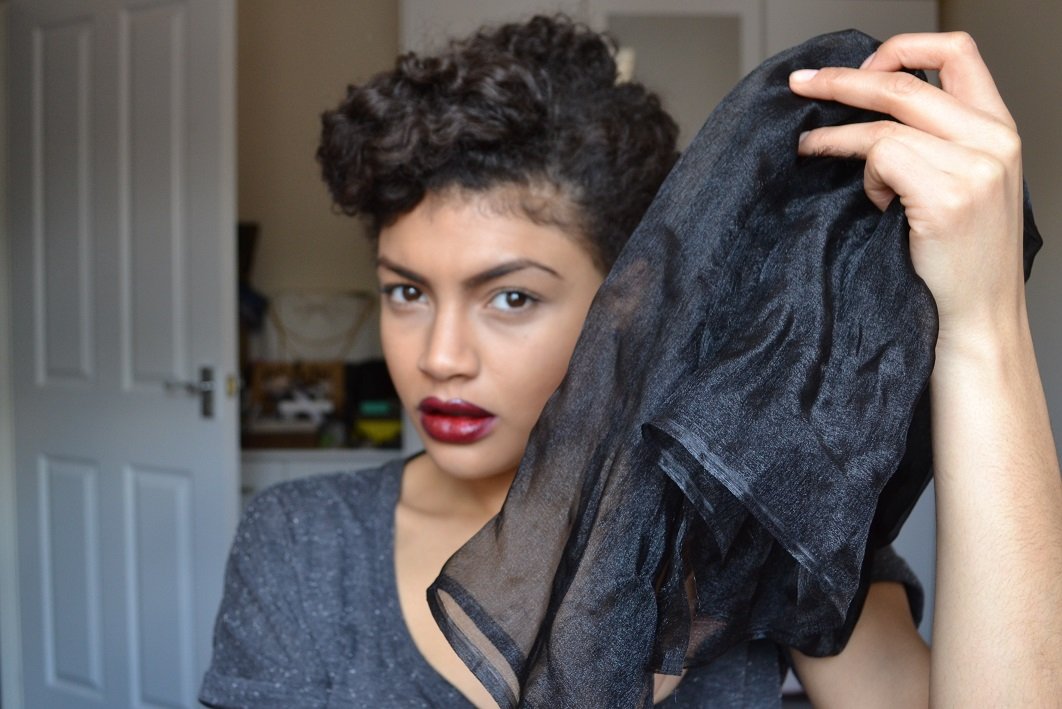
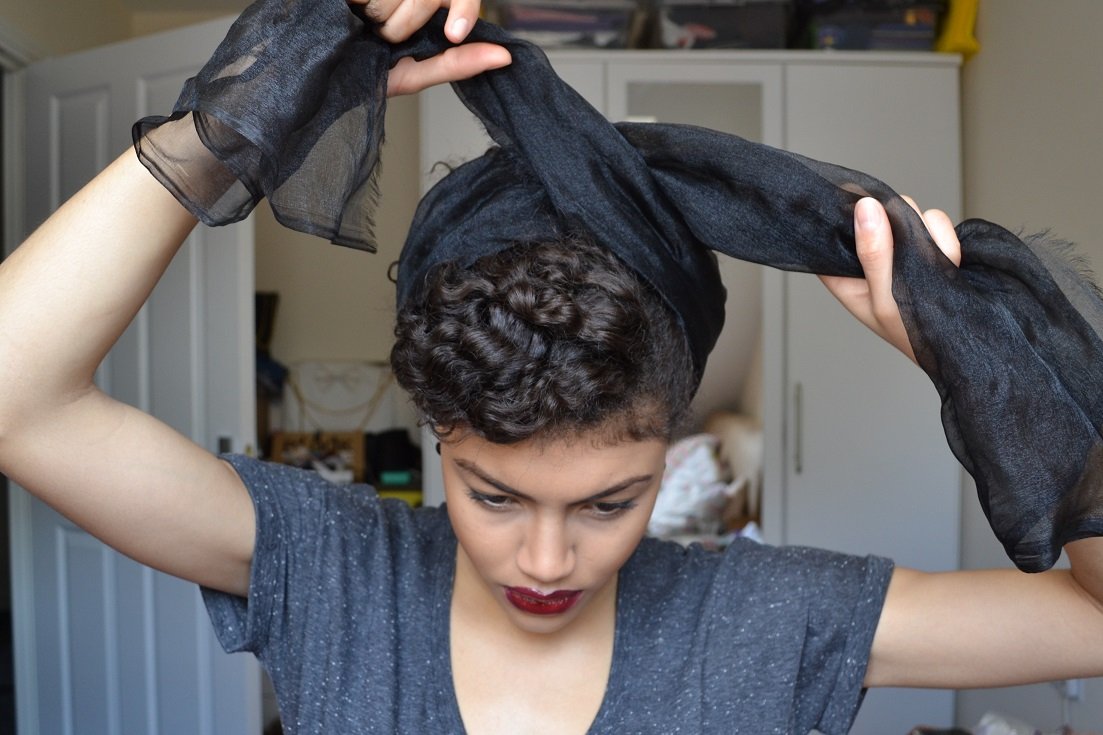
    If you’re sleeping on your braids, then it is advised to wear a silky head scarf to prevent fiction which can cause frizz. As my parts and braids aren’t particularly neat, I also like to wear a head scarf if I am going out with my protective hair style before doing a braid out.
    Samio Head Scarf Protective hair style

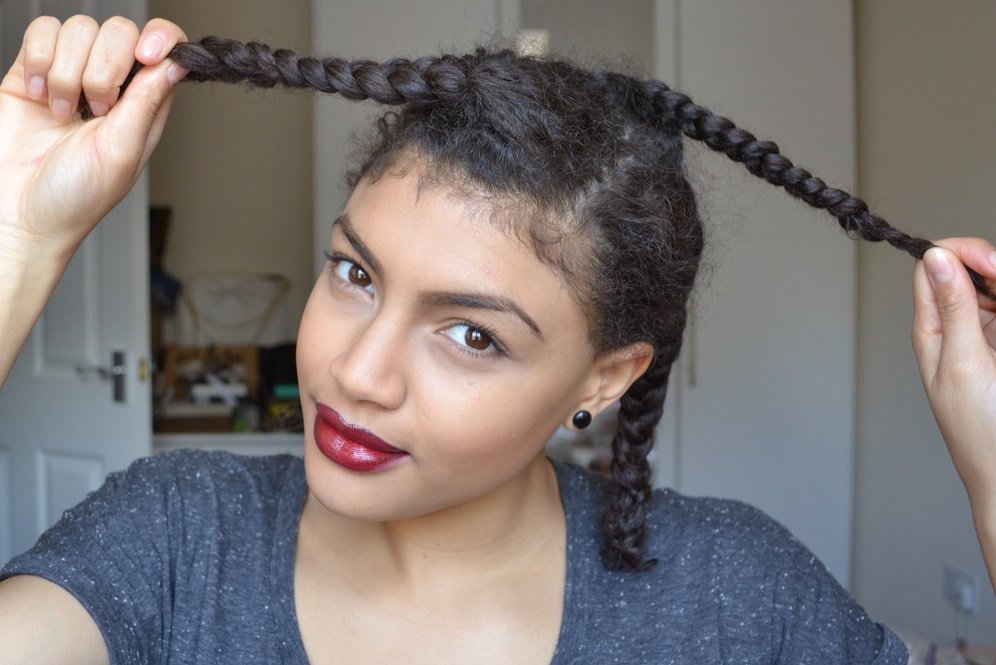
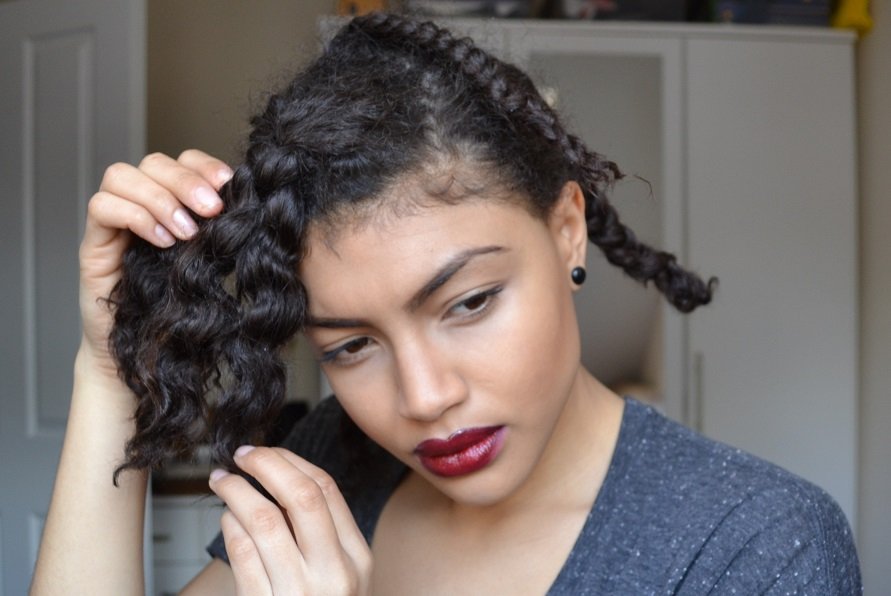
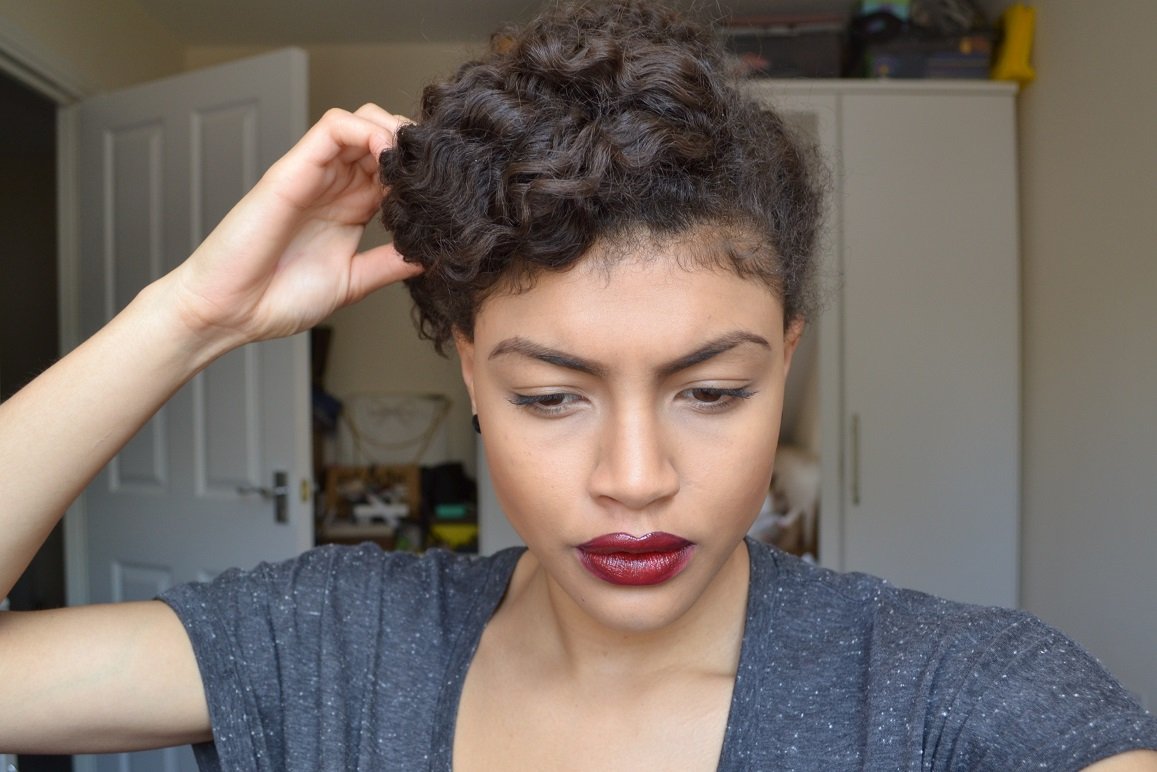
    When I’m ready to take my braids out (usually the morning after) I first check that the plaits feel fully dry. If I take the hair out damp, the style usually just falls flat. So it’s rather important that the hair is fully dry before taking out the plaits. I separate each plait carefully, as not to mess up the newly formed waves/curls.
    Braid out blog

    Once all my braids are out, I then use my fingers as a comb to carefully separate through the roots of my hair. I focus mainly on the root and not as much on the ends so that it doesn’t break up the curls and become too frizzy.
    Samio Braid Out Blog

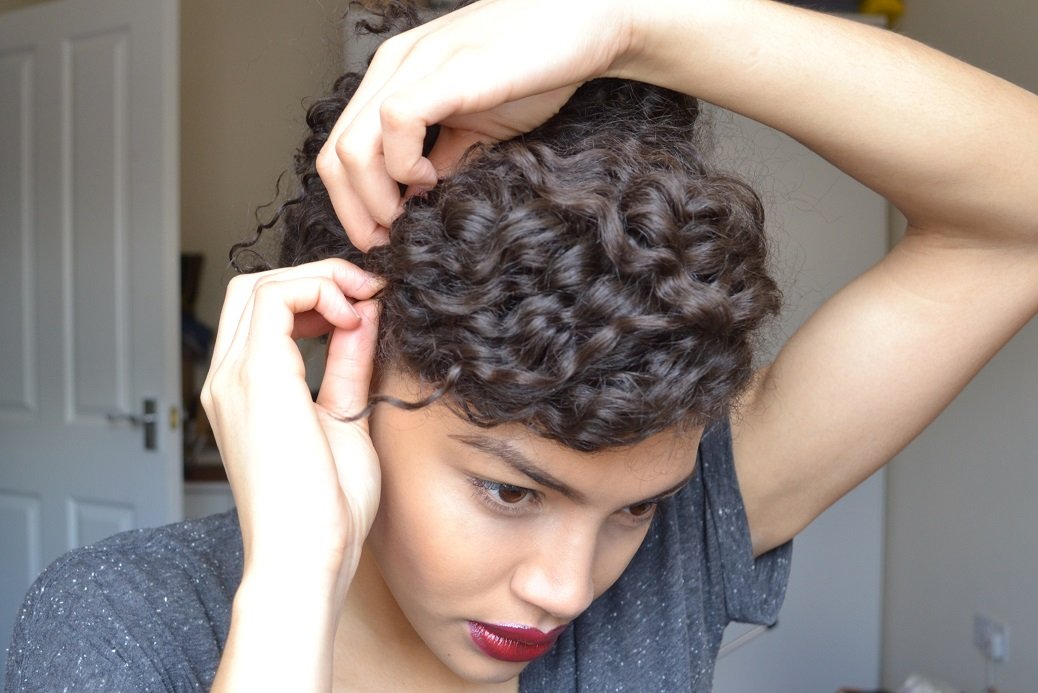
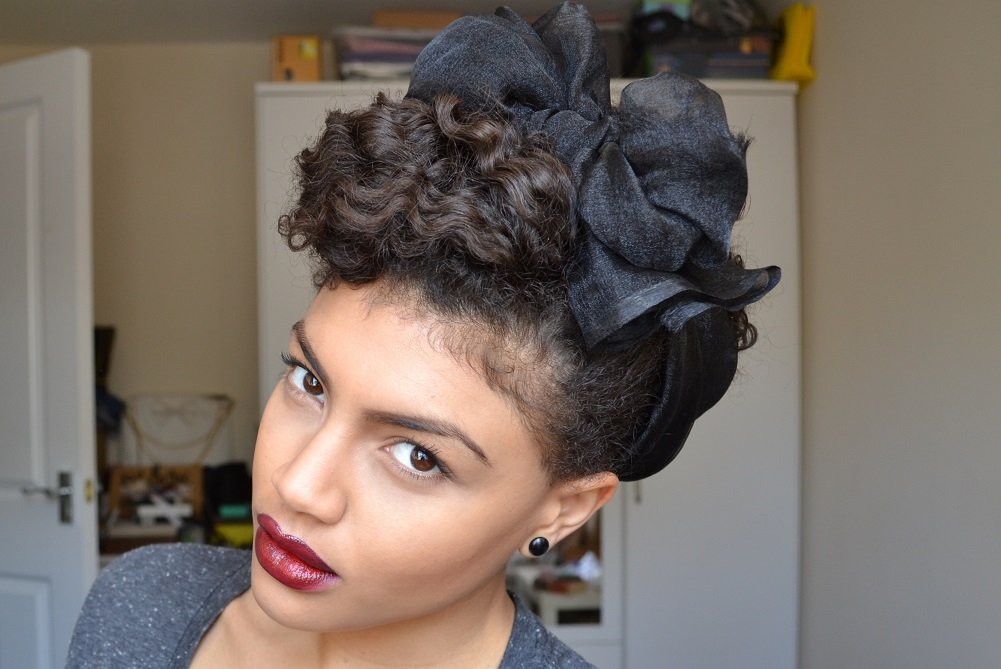
    If I want extra volume I will then go through my hair (again carefully) with an Afro comb… I also then like to give my hair a good shake.
    Samio Braid Out Curls Blog

    …And once the braid out is complete, I’m usually left with something like this.
    Samio Braid Out Afro Hair

    Want more styles to do with your braid out? Check out my previous style post here.

    Samio x

    Follow on Bloglovin

  • Braid Out – Retro Up Do

    Braid Out – Retro Up Do

    So you’re waiting for the fro to grow and you’re fed up with the same style, or maybe you’re happy with the length but just fancy trying out a new do… Well here is an easy to follow step by step tutorial of a simple yet fancy looking, braid out style. This style can be done on long or short hair and is perfect for those of you who like the vintage look. Continue below to follow my 12 simple steps to achieve this style

    What you will need:
    Leave in conditioner (or braid out product of your choice)
    Curvy grips/bobby pins
    Fabric or headscarf

    Step 1:

    The night before, separate the hair into about four sections, add product to each section (I used Aussie Conditioner) and then plait… Basically you’ll be doing a braid out, if you need instructions on how best to do a braid out, read this previous, how to post here. Please note: Make sure one of your parts is to the side of your head and not in the center. This will just help the hair to fall to one side better when you take out the plaits, so then the style will be easier to achieve.

    Samio Hair Tutorial 1

    Step 2:

    The next day, following on with the braid out process, undo the plaits carefully so not to mess up the newly formed wave in the hair.
    Samio Hair Tutorial 2

    Step 3:

    Continue to undo all the plaits until you’re left with a head of waves. Separate parts of the hair slightly if you feel you need to. Do this gently using your fingers so not to create too much frizz.
    Samio Hair Tutorial 3

    Step 4:

    Grab the majority of the hair, leaving about a quarter section to hang lose at the front…
    Samio Hair Tutorial 4

    Step 5:

    Pin the grabbed hair at the back of the head. Do this using bobby pins/curvy grips (as many as needed) to secure in place.
    Samio Hair Tutorial 5

    Step 6:

    Once the back part of the hair is pinned up and secured, you should be left with something that looks like this.
    Samio Hair Tutorial 6

    Step 7:

    Now grab the front section of hair and take it to the side and again pin in place. One hair grip should be enough to hold this section but use more if needed.
    Samio Hair Tutorial 7

    Step 8:

    Check that the front piece of hair is secure and that all grips are hidden.
    Samio Hair Tutorial 8

    Step 9:

    Now that your style is in place, it’s time for the finishing touch… Grab a headscarf of your choice. Here I have chosen to use a long strip of organza fabric. You can buy this fabric at most haberdasheries or even online for a reasonable price. Don’t worry if you don’t have any organza fabric, a head scarf or any remnant of your choice of fabric will do fine. Just make sure that the fabric/headcarf you use is long enough to wrap around your head and tie into a large bow.
    Samio Hair Tutorial 9

    Step 10:

    Wrap the fabric around the back of the head. Bring the fabric/headscarf together at the top of your head, just behind the front piece of pinned hair, then cross over and tie.
    Samio Hair Tutorial 10

    Step 11:

    Finish tying the bow (the same as you would with a shoe lace) at the top of your head and then adjust the bow so that you are happy with it. If needed, secure the fabric/headscarf with more pins.
    Samio Hair Tutorial 11

    Step 12:

    For the end result you should be left with something similar to this. Now go out, rock your new style and feel fabulous!
    Samio Hair Tutorial 12

    Did you try out this style? I would love to know how it worked for you… Feel free to share your results with me via Instagram & Twitter – @samiorenelda

    Samio x

    Follow on Bloglovin

  • Jirano – Hair Care

    Jirano – Hair Care

    Curls afro hair care

    Jane and Jedi, the founders behind HairCare brand Jirano were kind enough to send me a couple of their hair products to try out. The two products I recieved were Jirano’s Hair Masque and Intensive Hair Repair. The products are aimed at curly to Afro hair but claim to ‘moisturize, and tame, dry and frizzy hair’, so can be used on a number of hair types and textures.

    The packaging of the products is simple yet smart and the tubs are made of a strong plastic with a metal lid. The hair products are paraben free as well as being free of synthetic oils and synthetic fragrances.

    The first product I tried out was the Hair Masque – coconut and avocado infused. The hair masque is of a thick paste like consistency. The instructions on the tub instruct as follows ‘after washing apply to your hair. Leave on for 20 minutes and rinse.’

    Jirano Hair Masque

    I must admit I was slightly sceptical straight after first applying this product as it was thick and didn’t feel like it would soak easily into my hair. I followed the instructions and applied the products trying to spread it as evenly around my hair as possible. I didn’t use a huge amount of the product, I’d say around a small scoop full in my fingers. After applying I wrapped my hair up and left the masque on for 20 minutes as recommended.

    When rinsing out the Hair Masque it felt as though some of the product was left on the hair. I was unsure whether to wash it out but I decided to just go with the instructions and rinse it out as much as possible. I applied a small amount of one of my regular leave in conditioners (and I mean a very small amount) and then dried my hair.

    When drying my hair, my curls kept their natural coil (which is sometimes lost to frizz when using not much product) and the shine that my hair was left with was amazing. I was super impressed with this product and I loved it.

    Samio curls blog 2

    My hair was left looking and feeling great. I would say for my texture of hair and looser curl patterns, less of this product should be used as it is quite thick so not a lot is needed. I would imagine this product would also work wonders on super dry/frizzy hair and on more coarser Afro hair types. It is an ideal hair masque to use in these winter months when dry hair needs this moisture most.

    Samio curls blog

    The second product I tried was Intensive Hair Repair. It says ‘hydrate & mend dry hair – infused with coconut oil’. This product is of a runnier consistency, like that of a conditioner. The instructions on the tub say to ‘dampen hair & apply liberally. Wrap hair in shower cap for 30 minutes and rinse.’ I don’t have a shower cap so I just wrapped my hair in a towel.
    Although it didn’t instruct to do so, I applied this product straight after washing, as my hair needed a wash.

    When I came to rinse out the Intensive Hair Repair my hair was easy to comb through as it had soaked into the curls leaving them easier to manage.

    I let my hair air dry until still slightly damp and then applied a small amount of my usual product, Macadamia Oil. Again I used way less Macadamia Oil than I usually would as I wanted to see best as I could the results from the Intensive Hair Repair. This time, instead of a wash and go I sectioned my hair into five braids ready to do a braid out the next day.

    When I took the braids out the next morning, I had intended to add more of my usual products to revitalise my curls but as I unravelled the plaits, my curls were bouncing back.

    20140206-230753.jpg

    Samio curls blog 3

    I was really pleasantly surprised with how good the Intensive Hair Repair had left my curls feeling. My hair felt so soft and was almost product free. Usually when I have this little product in my hair, it is so much more frizzier. There was some natural frizz to my hair but I quite liked it as it just gave my hair it’s natural look but still holding much of the coils.

    samio curls blog 7

    I’m really pleased with the results after using these two Jirano products and I would definitely recommend them to anyone with dry or frizzy hair as they work wonders at rejuvenating curls and minimising frizz.

    You can read Jane and Jedi’s story here http://www.jirano.com/our-story

    Follow on Bloglovin
    Samio x

  • Braid Out Vs Wash & Go

    Braid Out Vs Wash & Go

    I constantly get asked what my hair routine is and what products I use. So I thought it was about time I finally did a hair post detailing my two go to techniques that I regularly use to achieve my most common hair styles.

    BRIAD OUT

    I regularly do a braid out when I’m busy and don’t have time to wash and dry my hair in the morning. A braid out is achieved by braiding the hair and then leaving the braids in for a length of time before taking out the braids. Once the braids are taken out you should be left with hair which has been tamed slightly as it has taken the shape of the braids, to create loose curls or waves. Obviously the longer you are able to leave the braids in the better the desired result, when taking the braids out. Often perpetration the night before I find works best. A lot of people see braid outs as a chore but for me I find it one of the simplest ways to prep my hair and treat my hair at the same time.

    What products should I use and how much should I use?

    The first thing I do before I braid my hair is prep my hair with products. If I’ve just washed my hair I’ll usually wait until my hair is almost dry but still slightly damp to add the products. If I’m not washing my hair and I’m just adding more product, I’ll sometimes dampen the hair first by patting it with wet hands. I do this so not to soak the hair but just to lightly wet it to make it more manageable when braiding. The products used can often help to dampen the hair too, again making it more manageable for braiding. I’ll lightly comb through the sections with my fingers before braiding each part.

    Which products you use is up to you and it often takes some experimenting and trying out different things to find out which products work best for you.

    The products I mostly use when doing a braid out are; Macadamia Oil Treatment and Inecto Coconut Hair Repair Treatment. The Inecto treatment is actually a wash out product but I find it works really well at keeping my curls intact when left in my hair. I’ll usually use about two large dollops of the Inecto treatment for each braid and then run through the ends with a pea sized amount of the Macadamia oil treatment.

    20130901-162751.jpg

    How many braids should I do and how should they look?

    The amount of braids/plaits you do is up to you. The braids shouldn’t take you hours to do. Depending on how much time I have to spend prepping my hair, I’ll usually do between two and six braids (two when I’m feeling really lazy). The amount of braids you do also affects what type of curl/wave pattern you’ll achieve. Usually bigger braids and plaits give a looser wave and smaller ones create a much tighter wave or curl.

    Most times I’ll do five braids and although they don’t have to look particularly neat, it always helps to make one of the parts where you intend to have your actual parting once the braids are taken out.

    For this braid out I went for a middle part.

    20130901-124735.jpg-Continue braiding the hair like this until you’ve braided all the hair.

    Do I need to wrap my hair after braiding?

    Before going to bed it’s best to cover your hair with some kind of hair net or scarf, that way it stops friction between the hair and the pillow, as to prevent frizz. If I’m going out and my hair is in braids I’ll usually wear a headscarf.

    20130901-134224.jpg
    Taking out the braids

    Take out each braid until you’re left with a head of wavy/curly hair similar to this.

    20130901-130054.jpg

    How do I separate the hair and make it look more natural?

    An important tool to use is an afro comb. If you don’t have an afro comb, don’t panic, you can always use your fingers to tease out the hair.

    Start with a wide tooth afro comb and working from the root, gently tease the hair out. Be carful not to drag the comb all the way through the hair, as this will brush the hair out and ruin the style. I’ll usually work on my hair with a smaller toothed comb towards the ends but again, using your fingers is fine and the size of comb is just a preference.

    20130901-130436.jpg

    The end result

    20130901-135318.jpg
    WASH AND GO

    For a wash and go the technique is easy, you simply need to wash your hair, add your products and let it dry. I tend to do a wash and go when I have more time to wash and dry my hair and when I want to have my natural curls out. It’s all about finding the products that are right for your hair, working out how much to use and when to use them. Serums and oils are good on dry parts of the hair. For example, when I took the pictures for this post I was due a trim, so I used more oil on the ends to help eliminate frizz. Since then I’ve had a hair cut (only a trim I’ve not gone bald or anything) and now I’m able to use less serum/oily products as the ends are in better condition. It’s always good to rotate which products you use anyway, so that your hair doesn’t get use to them and stop producing the same results.

    What should I wash my hair with?

    You can use shampoo and conditioner. I use a two in one product called Macadamia Flawless (click here to see previous review post), it works wonders on my hair and helps it dry quicker. When I’m in the shower and I still have some of the product in my hair (or conditioner), I’ll comb through it, starting at the ends and working my way up before rinsing.

    What products should I use and how much should I use?

    After washing my hair I’ll wrap my hair in a towel and leave it to soak up the excess water. Whilst the hair is still damp, I apply my products. Again I use Macadamia Oil Treatment and Inecto Hair Repair Treatment. Other products I like to use are; Aussie Miracle Moist conditioner and Twisted Sister Curl Activator Cream. I like to change which products I use from time to time and will usually use a combination of about two at a time. I probably use around five large dollops of a product, making sure it’s spread evenly through my hair. I’ll use serum or the Macadamia oil treatment to run thought the ends (when needed) and any dry parts.

    20130901-163156.jpg

    20130901-140510.jpg

    How should I dry my hair?

    I used to be really good and avoid hair dryers as much as possible, letting my hair dry naturally. More recently though I’ve slipped back into my old habits and started using a hair dryer again, hence me using an old travel size hair dryer at the moment. Since I’ve started using a hair dryer again, I should buy a new one that at least ‘claims’ to be gentle on your hair…. Anyway, if you have time it’s always good to let your hair dry naturally but if you’re like me and want speedy results, then you can use a hair dryer and keep it on a lower heat if you want to ‘be good’ to your hair.

    As I’m drying my hair, I’ll tend to tease out it out slightly by pulling parts whilst drying it to add length when dried.

    20130901-145254.jpg

    How do I make my hair big?

    This is a question I get asked a lot and the cut is really important when it comes to this. Layers really help make the hair look thicker and add volume. Another thing that helps add volume is my all time favourite tool, the afro comb!

    Once my hair is fully dried, I’m ready to add volume and tease out some of the curls slightly by working though it with my afro comb. The technique is basically the same as when I’m teasing out my hair after a braid out. I’m usually slightly more rough when teasing out my hair after it’s washed and dried, as I know it takes a lot to break up the natural coils and so it won’t ruin the style. I like to tease out my hair and work through it until it starts to get a more natural look, where the curls are still intact but they don’t look too perfect. Most importantly, I like my hair to look big.

    20130901-145918.jpg

    The end result

    20130901-150800.jpg

    And there you have it, Braid out Vs Wash and go, my two favourite hair routines for styling my afro.

    Samio x

  • Black Girl with Long Hair

    I often get messages off people asking about my hair care regime and what products I use so it was great when Black Girl with Long Hair asked me to do a feature on their site. Their website is a great way for people of the natural hair community to share and discuss their personal hair tips and ideas.
    (more…)